Class of 1934 Honor Roll Award

Last week I was honored to receive a teaching award from the Center for Teaching and Learning at Georgia tech – the Student Recognition of Excellence in Teaching: Class of 1934 CIOS Honor Roll, for Fall 2020 (last semester).

This award is only given to instructors who have an 85% response rate and have top scores on certain items on the CIOS. The CIOS is an anonymous survey that students voluntarily complete for their classes at the end of the semester. The 1934 Honor Roll award acknowledges instructors who have earned excellent scores on questions related to instructor’s respect and concern for students, level of enthusiasm about teaching the course, and ability to stimulate interest in the subject matter.

In other words, I could not have been given this award unless most of my students last semester filled out the survey, and students gave high enough ratings for me to be considered for the award. So I want to thank every one of my 577 Fall 2020 students. They were high school students taking a 1000 level college course as part of the Distance Math Program, and it was an honor being their instructor last semester.

Thank you students for your hard work, the hundreds of questions we had over the semester that helped you succeed in the course, coming to office hours and asking questions, and engaging with each other on the course forums to build community and develop a deeper understanding of linear algebra, especially in a semester that was more challenging in some ways because of the pandemic. Students were more isolated than usual, and it was wonderful to see students developing online community and helping each other throughout the semester.

I could not have received this award without the help of many others. GT Admissions, GT Professional Education (GTPE), and the School of Math have been re-developing the course for months. I had been working on the course for about eight months leading up to the Fall semester them to redesign the course to move to an asynchronous delivery model. So thank you GTPE for all the support leading up to Fall 2020, and also the support during the fall to provide technical support. Thank you GT Admissions for helping with registration and recruiting students into the program. Last but not least, many thanks to the four teaching assistants that I had last fall, who also supported our students in many ways. They ran live studio sessions for our students, held office hours, helped grade assignments and corrected typos on exams, and more.

Certainly all of the support helped the semester run smoothly, helped students focus on their studies, and helped build a positive learning environment for our students.

What Does 6 ÷ ½ Represent? Why?

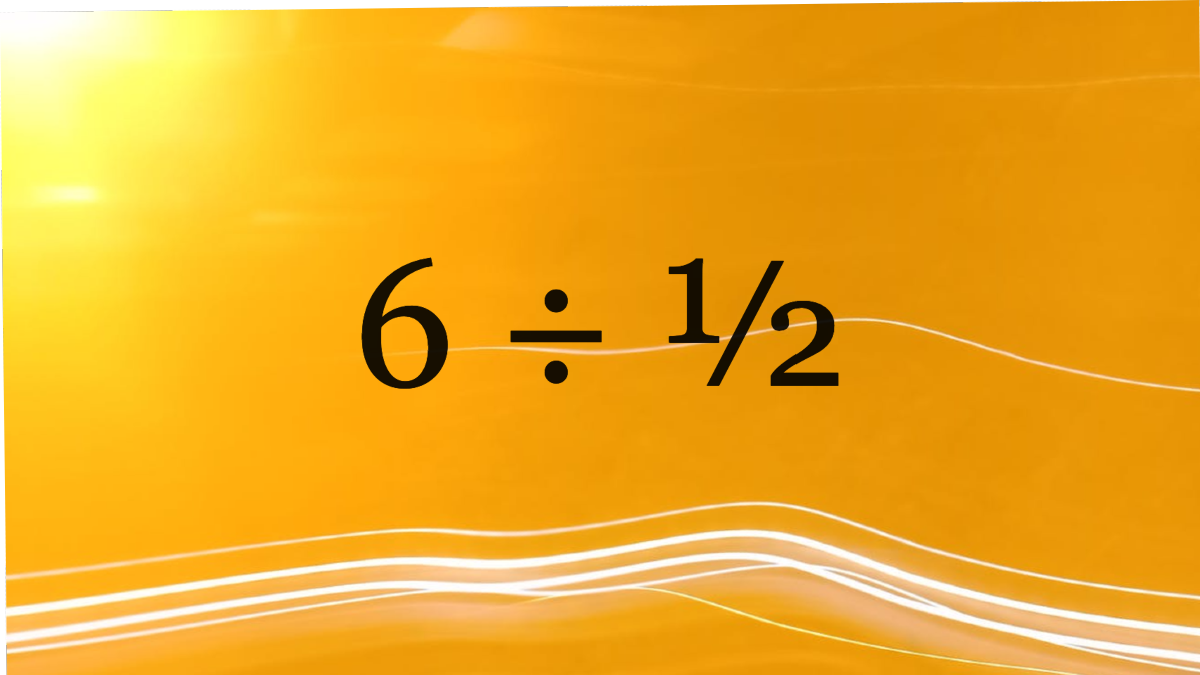
To calculate 6 ÷ ½, we can first convert the division into a multiplication.

6 ÷ ½ = 6 × 2 = 12

With this procedure, computing 6÷½ is straightforward. But, why can we replace the division with a multiplication? In other words, what does 6 ÷ ½ represent? And what are we doing when we divide an integer by a fraction, like 1/2?

Last week I started tutoring a Florida student in grade five who wanted help with multiplying and dividing with fractions and decimals. This is not an area of math that I normally teach, so I immediately began searching for activities for my student and I to work on so that I could answer some of these questions in a few different ways that would make sense to someone in grade 5.

Mathematics Assessment Project

I successfully re-discovered the MARS Mathematics Assessments Projects, which is a resource I used years ago on a project I was working on. The site has several free resources for K6 -12 teachers. Curriculum is aligned to the common core, which made it easy to find the content I needed.

Although most of the content is too advanced for my student but there was one set of activities on multiplying and dividing by fractions that had a few useful and interesting activities, like asking what 6 ÷ ½ represents.

Here is a way to think about this question that my student and I explored in one of our sessions.

Exploring Patterns

When we think about division with integers, we can see a pattern that might be useful when thinking about division with a fraction.

Consider the fraction 12/6. We know that 12/6 = 2. Why? Because 2 is the number, that when multiplied by the denominator, 6, gives us 12.

Likewise, we know that the fraction 12/4 equals 3, because 3 is the number, that when multiplied by 4 gives us 12.

And so on for other fractions:

  • 12÷3 = 12/3 = 4 because 4×3 = 12
  • 12÷3 = 12/2 = 6 because 6×2 = 12
  • 12÷1 = 12/1 = 12 because 12×1 = 12

When the denominator is a fraction, we can use the same logic.

12 ÷ ½ = 24, because 24 × ½ = 12

Likewise, 6 ÷ ½ = 12, because 12 × ½ = 6. In other words, 6 ÷ ½ represents the number that when multiplied by ½ is 6.

Updates To My DIY Electronic Geocaching Bracelet

Geocaching BraceletAfter taking the geocaching bracelet that I made on a little field test last weekend, I realized there were a few silly errors in the code I wrote for this gadget. One of the smaller and yet significant errors was a missing comma between the latitude and longitude coordinates of the cache we were looking for. As a result of this missing character, the bracelet was unable to recognize the correct location of the cache, and we couldn’t use the bracelet. Although we had the correct coordinates in a phone that had the official Geocaching app and were able to locate our cache with it, it was interesting to experience how a simple error in the code had a practical implication. Most (but not all) of the products I use every day have all/most of their bugs worked out before I start using them, so this isn’t a process that happens very often. It helped me appreciate the work that goes into designing the many gadgets I use from day-to-day, and the importance of fine details (like missing commas) in a way that DIY programming projects are certainly capable of.

Where I seem to be stuck now is deciding where to go from here: do I continue working on the bracelet, or do I move on to another project? How could I make further improvements or add additional features? I’m sure I’ll find another project to keep me busy, but in any case, a few other minor errors in the code were identified, repaired, and the code on GitHub was updated.

Updating my Programmable Jam Jar Light for a Camping Trip

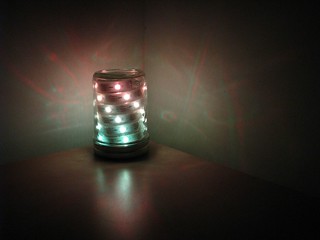
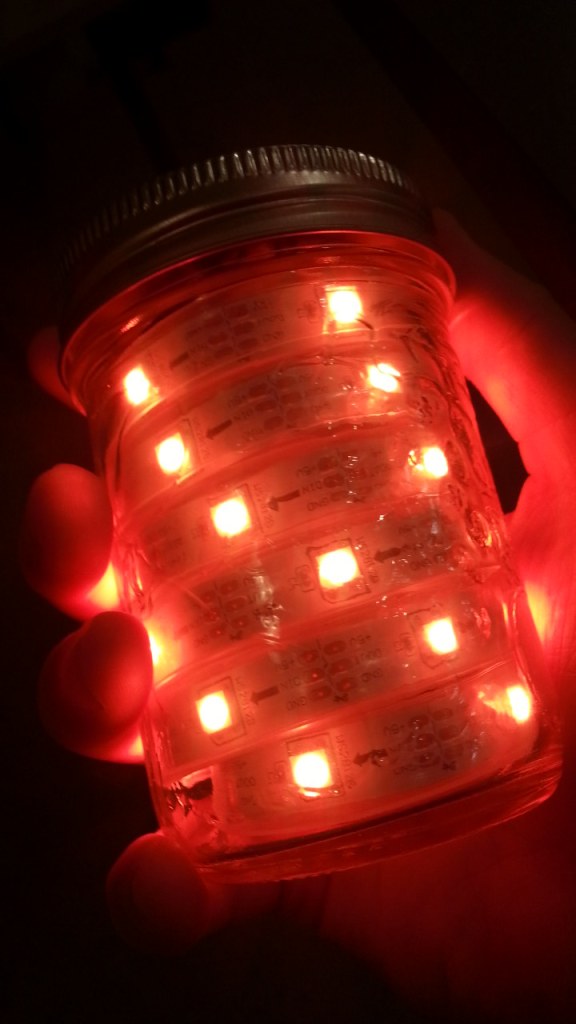
Jam Jar LightA few months ago I created a Jam Jar light with a programmable weatherproof RGB NeoPixel strip from Adafruit. It’s a simple, fun, interactive gadget for short camping trips that helps me see at night. Using a bit of code that I placed on a Flora micro controller, and an accelerometer and a compass, the jam jar’s orientation relative to the local magnetic field determined its colour, and giving the jar a good shake turns the lights on and off.

When I took the little gadget camping with me back in February, I decided it needed a few modifications, which I just got around to finishing last weekend.

  1. Rather than having the colour of the lights fixed when the jar is stationary, the colours now very slowly cycle through red, green, and blue. I find that the jar is more relaxing when the colours are slowly changing.
  2. It was hard to adjust the brightness of the lights on the campsite without getting into the code, so now they’re adjusted by turning the jar: the local magnetic field changes the brightness according to the function B = (tan-1(Mx/My)/π + 1)/2, where Mx and My are components of the local magnetic field. The number B ranges from 0 to 1: when B is close to zero, the lights are off, and when B is close to 1, the lights are at their maximum brightness.
  3. The acceleration threshold was a bit too low: whenever the picnic bench jiggled, the light would turn off/on. So I doubled the threshold that determines whether the lights turn off/on.

The revised version of the code is up on a GitHub repository, I took a few pictures of the device on my Flickr photosteam, and the video below gives you an idea of how it works.


Making a Geocaching Navigation Device

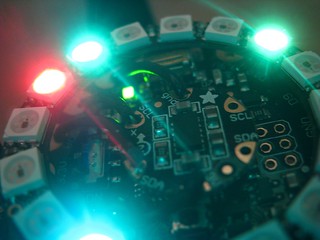
After applying a few minor adjustments to the Adafruit NeoGeo watch Arduino code and a few months of procrastination, I’ve made a device that indicates roughly how far I am from any number of destinations that I set. All of the code I used is here on GitHub.

An arduino project  I'm working on that indicates how far away I am from multiple targets based on gps.

The idea to create this little contraption came from my Geocaching adventures with my nieces and nephew: my little device currently tells me where a dozen or so caches are located in Windsor, Ontario, but I’ve also configured it to point me towards coffee shops and other places closer to where I live.

Each light in the device corresponds to a target within 1 km of my current location. Notice that as I rotate, the lights hold their approximate directions of the targets. Red indicates close, blue indicates very far away.

Most smart phones will do a significantly better job of navigating to any location, especially Geocaches. When I Geocache with my family, we often only have one person who has a working phone app at a time; so I’m wondering if it might be more fun to navigate outdoors with multiple navigation devices, especially with kids. But even if we already had multiple phones for navigation: I enjoy programming, coding with Arduino is very easy, I already had most of the pieces that I needed lying around from other projects, and I was really curious to see what it’s like coding with something that has a GPS module. Learning how to work with GPS coordinates kind of sets me up for other interesting projects down the road.

How it Works

The code in the device calculates, once every 20 ms, the distance from its current GPS coordinates to every destination that is entered into an array. Luckily, the Adafruit NeoGeo watch had code that performs this calculation for one destination, so I basically just extended their code to compute distances to any number of destinations with a loop. The code then converts these distances to colours, from 0 meters (red), to 1000 meters (blue), and the compass is used to determine which light in the ring should be activated. The lights that are activated “point” in the direction that the person using it needs to move towards in order to reach destinations that are within 1000 meters (i.e. – 1 km).

The Modifications I Made

Most of the code I used was based on the NeoGeo watch code. I simply modified their code

  • to adjust the brightness of the lights (the lights were too bright when demonstrating its use indoors),
  • to change the colours so that they would start at blue (far away) to red (very close),
  • to introduce a threshold distance, so that destinations over 1000 meters away won’t be displayed,
  • to add a yellow circulating pattern to indicate when none of the destinations are located within the threshold distance of 1 km,
  • to account for the compass to be orientated facing up (instead of down),
  • by removing its ability for the device to tell the current time, which might be cool, I’m thinking of putting it back, and
  • to display multiple distances simultaneously by adding more arrays into the code.

The NeoGeo watch instructions places the GPS on top of the compass, but that would hide the compass and FLORA chips, and I think the device is way cooler looking when it shows them off.

The Hardware

I soldered a ring of LEDs, a compass chip, and a GPS chip to a micro-controller. I already had the tools and some of the hardware that I needed (it was only the LED ring and GPS chip that I needed to purchase):

Challenges

Multiple Destinations in the Same Direction

There are only 16 lights, so if multiple destinations need to activate the same light, only the closest of those overlapping destinations is displayed. Adding another NeoPixel ring with a different diameter could help, but for Geocaching, overlapping lights aren’t a major issue, I think. More significantly, there isn’t a way to tell the Flora to stop giving you the distance to a cache you’ve already found or don’t want to navigate to. I’m not sure how to adjust for that, but maybe that’s ok. I think I’ll always Geocache with at least one phone.

Maintaining a Satellite Fix and GPS Errors

From time to time, the GPS chip loses its connection with satellites, or the GPS decides that there are no destinations within 1000 meters, perhaps because it is placing its coordinates incorrectly (or because of something silly I did with the code). In any case, the latter problem seems to be easily fixed by resetting the device. The former problem seems to be unfixable. Perhaps I need a better GPS chip?

Batteries

Finally, I brought this device with me to Canada for the Easter weekend, but sadly the battery cables snapped off before I even got to field-test it. I didn’t have a soldering iron with me to fix it, and our attempts at fixing it with duct tape and glue didn’t go very far. Lesson learned: simply have a spare battery on hand.

Freezing Rain in Downtown Atlanta

Midtown Atlanta today was covered in a layer of ice Wednesday morning. Where I live, near North Avenue and Piedmont, the roads were covered in an icy slush that didn’t seem to be very slippery; the few careful drivers that were on the roads were not sliding, often. I took a video of the traffic near the Fox Theatre this morning, which seemed to be moving along alright. Drivers were cautious, but alright.

I was lucky to have the day off, and power in my apartment throughout the day. Earlier today, The Atlanta Journal Constitution reported more that 150,000 customers across Georgia were without electricity. An up-to-date map of power outages in the state gives a current sense of the location and scale of the power-outs. The freezing rain is expected to last until the 7:00 AM Thursday, so it’s not over yet.

Later in the afternoon today, I wandered downtown and took a few photographs of the Fox Theatre, the Sun Trust building, and a few other places to capture a view of the weather in my neighbourhood. You can click on any one of the photos to view a fancy slideshow.


A video I took from the bottom of the Sun Trust building, near the intersection of Peachtree Street NE and West Peachtree Street NE. shows a bit of wind, and some ice on the trees.

Programming a Jam Jar Light

I’m working on a smiple LED mood light that changes colour based on its orientation to the local magnetic field and uses an accelerometer to switch the power on/off. The little contraption consists of a programmable NeoPixel strip, wired to a Flora micro controller, wired to a compass & accelerometer sensor, all powered by a LiPo battery. The electronics are stuffed into a pretty jam jar that keeps things together, and the frosted lamp helps to soften the crisp LED light. I made a fancy video of my work in progress.


Shaking the jar switches the lights on/off, and there’s a two second delay when the light switches off that I think might need adjusting.

The idea for this small project came to me last month while camping with a friend on Jekyll Island. Some of the campsites had beautiful LED lighting systems (eg – glowy puzzle lights) and I wanted to see if I could make something with the electronics I already had. I recently added 80’s lights to my bicycle bag with programmable LEDs, but I wasn’t really using the bag very often, so I took the pieces from that project and started making a jam jar light. I’m not sure if/how well it will function while camping yet, but I’ll get to take it on a “field test” next weekend, we’re camping again in south Georgia.

The Code

The code I wrote is similar to what I had used for the bicycle bag lights; I replaced the 80’s with a piecewise continuous function to control the colours based on the heading of the magnetometer sensor as it rotates:

H = \arctan\Big(\frac{M_{y,normalized}}{M_{x,normalized}}\Big).

The normalized magnetizations in the x and y directions are Mx,normalized and My,normalized. which are normalized so that their values range from -1 to 1. The heading in degrees, H, is then used to calculate the colour of the lights, C, based on a set of conditional statements that can be found in several of the adafruit libraries:

if 0 ≤ H ≤ 85, C = [255 – 3H,  3H,  0]
if 85 < H ≤ 170, C = [0,  255 – 3(H – 85),  3(H – 85)]]
if 170 < H ≤ 360, C = [3(H – 170),  0,  255 – 3(H – 170)]

The entire project only took me a few hours to code and assemble: adafruit components are extremely easy to work with. What do you think about this little project?

The light uses a 30 LED programmable NeoPixel strip from AdaFruit.

Experimenting with Group Work in On-Line Synchronous Recitations

If you are interested in knowing more about the work I do at Georgia Tech, this is a copy of a presentation (PDF) that I gave at the 2013 Joint Mathematics Meetings in San Diego, CA, about a year ago (a recent request for sharing copies of my slides prompted me to getting around to posting this).

It’s Snowing in Atlanta

It’s snowing in Atlanta, and for the first time since 2011 (that I’m aware of), snow is sticking to the ground. Being from Canada where snow can be found on the ground every year during the winter, the reactions and conversations I heard today were entertaining. Someone at work joked: it’s like Canada in the summer!

Georgia Tech, where I work, closed at 1:30 PM, officially due to the severe weather warning, as posted on their Twitter feed. At noon I looked outside and saw a cm of slush on the roads. This wouldn’t be considered severe in the north, but here in the south, where there are no plows, no salt trucks, and drivers aren’t used to driving in the snow (to be honest, I’m not either), the weather is actually severe.

So I left work at 1:30, took a few photos of campus, and made my way home among heavy traffic from all the drivers who decided, like me, to head home early.

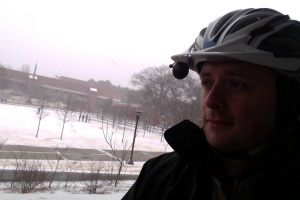
Me on a snowy Georgia Tech campus, January 28, 2014

Warming up at a coffee shop today, a random guy came up to me and started a pleasant conversation.

Coffee shop guy: Whoa that’s a cool sweater, where’d’ya get it?
Me: uh, Thank you. Vancouver. Canada.
Coffee shop guy: Canadians are so much better at dressing in the Winter.

I don’t know if I could agree with him completely on that conjecture, but I thanked him for his kindness.

Programming 80’s Bike Lights

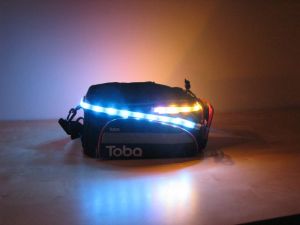
I’m working on lights for my bicycle bag that will change colour based on my acceleration and the direction I’m moving in. The extra lights might help drivers see me at night, although the primary goal here is have fun while building and programming stuff for my bicycle, and to celebrate the 80’s in a silly way. The whole idea was initially inspired by Adafruit’s DIY Citi Bike Helmet, and I saw the other day that another guy made something similar.

A safety disclaimer: I use other red and white lights at night to be visible at night, and it might not be a good idea to ride a bicycle that has flashing blue lights. I’m curious as to whether drivers would pull over if they saw me coming, but I’m not sure I want to go down that road, pun intended.

What it Does

A short demonstration of the work in progress:

How it Works

I velcro’d a strip of 30 LEDs, whose colours are controlled by a sensor that measures acceleration and compass direction, about once per second, to a small bike bag that I rarely use. I already had the bag and tools and the pieces came to about $65. My list of materials:

The 80’s

I wrote some Arduino code that converts sensor data to set LED colors, so that when I’m riding

When my acceleration exceeds 1.2 g’s (the constant g is 9.82 m/s2), the lights go to ludicrous speed: they use the plaid colours from a scene from Spaceballs (because light speed is too slow).

Tron Mode: blue, yellow, and a bit of purple.

Normalizing the Sensors

The sensor simultaneously measures acceleration and magnetic field on three orthogonal axes. Interestingly, measurements are not normalized to anything meaningful. So I used this formula to normalize the ith component of the raw magnetization, Mi,raw,

Mi,normalized = (Mi,raw – Mi,mean) / (Mi,max – Mi,min).

The formula should map the magnetometer readings onto the unit sphere, the subscripts indicate what each variable refers to, and the min and max readings I found by moving the sensor around.

The accelerometer measures proper acceleration (i.e. – it includes gravitational acceleration) and I only needed its magnitude (i.e. – the square root of the sum the squares), so after normalizing each component I calculated the magnitude, which should be about 1.00 when the bag is stationary.

Spherical Coordinates

Although far from necessary, I incorporated a modified spherical coordinate system to determine compass direction and control the LED colours: the sensor measures along three orthogonal axes, x, y, z, with the y-axis pointing towards the sky. When the bag rotates about the y-axis, the normalized x and z components of the magnetization vector oscillate in a way that I think can be modeled with trigonometric functions and spherical coordinates, by calculating the heading with the function:

heading in degrees = arctan(Mz,normalized/Mx,normalized).

Placing my cell near the bag with its compass app running let me check the numbers the sensor was giving me.

What I Learned

Aside from learning how to program with Arduino and with a sensor, and refining my soldering skills:

  • I would have guessed that the magnetization vector points in a direction a bit off from geographic north but parallel to the surface of the earth: my magnetometer was telling me that it points towards magnetic north, but with a 70 degree offset from horizontal. Is my magnetometer giving me an error?
  • I was surprised by how easily the magnetometer gets really messed up whenever metallic objects get close to it, especially to the AAA battery pack that I use to power the whole contraption. I’ve since replaced the AAA pack a LiPo with better results.

What’s Next?

The lights seems to get stuck in one or two modes because the sensor’s normalization constants drift to significantly different values from day to day, and I’m not entirely sure why. So I might re-code the Flora so that the lights stay in Knight Rider mode all the time, or start all over again with a color scheme that varies continuously with sensor measurements. And I think it might be fun to play with other lighting effects: its easy to re-program the Flora.